Tuesday, December 15, 2015

Valentine's Day Card


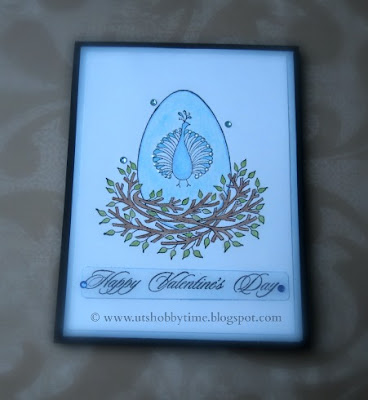
Hello All,  I am sharing a CAS card today.  I started by stamping the Peacock image stamped on a white cardstock using Memento Black ink and colored the image using color pencil. Took another piece of white card stock and inked the background using Memento Summer Sky ink I then, adhered the stamped panel on the inked card stock.

Peacock nest from io stamps

I sponged another small piece of white card stock and stamped the sentiment on it. Next, I glued the sentiment on the main panel. Finally, added rhinestones and liquid pearls (peacock feathers)  to decorate the card. Both the  Peacock Nest stamp and Happy Valentine's Day sentiment are from IO Stamps.

Happy valentines day card
                                  

Thanks for stopping by. Have a nice day.
 
If you like this post, please follow or subscribe to my blog by email / RSS or like us on Facebook

 Linking to :Lemon Shortbread,TTCRD, ,IO Challenge, Simon Says Stamp (added liquid pearls), Craft Your Passion, 

Friday, November 27, 2015

Love CAS Card


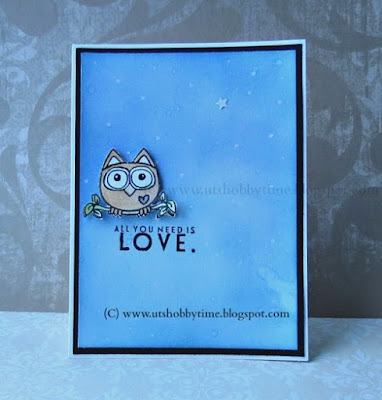
handmade cards for love


To make this card, I took a white card stock and inked it with Broken China and Shaded Lilac Distress Ink. Then I stamped the image double time in another piece of card stock and colored them using distress ink. I fuzzy cut the stamped owls and adhered them with foam tape to give dimension. 


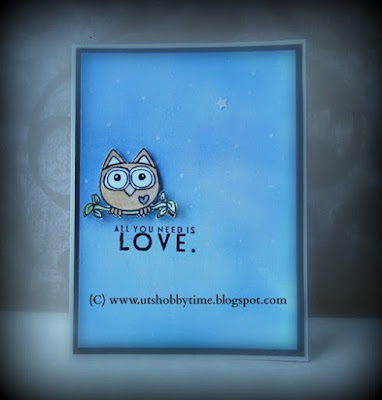
homemade love you card

Next, I stamped the sentiment  using Memento black ink and added a star confetti and white dots using white chalk marker. Finally mounted it on black card stock and adhered them on the white card base. Both the Owl and sentiment are from Whooty Itty Bitty stamp set from Unity Stamp

beautiful handmade love cards

Hope you liked it and Thanks for stopping by. Have a wonderful day.

Friday, November 13, 2015

Homemade "Thinking of you " greeting Card


simple homemade cards

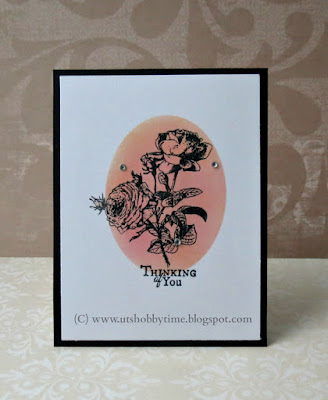
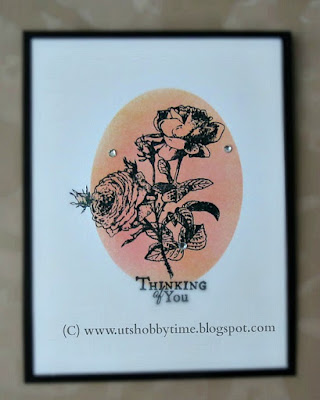
Hello All. I made  a card using Reverse masking technique. To create the oval mask, I used Spellbinder classic oval die set to cutout the oval shape and used the outline as a stencil. I then laid the hollow piece of card stock on to the white card stock and sponged it with dried marigold and worn lipstick distress ink. 

CAS cards

Next, I removed the mask and stamped the rose flower image and sentiment using Memento black ink and mounted it on black card stock. Finally added rhinestones to embellish it. Both the image and the sentiment are from Parisian Postcard Stamp set by Sweet n Sassy Stamps. Hope you liked it.

Distress ink projects

Thanks for stopping by. Have a nice day.
 
If you like this post, please follow or subscribe to my blog by email / RSS or like us on Facebook

Linking to : Sweet n Sassy, Simon Says Stamp, Scrapbook Blessings Club , Power Poppy ,Word Art Wednesday

Tuesday, October 27, 2015

Handmade "Chase Your Dream" CAS Card

handmade greeting card

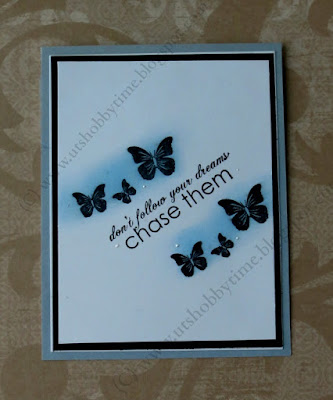
Hello all! Today I am sharing a CAS card I made. To make this card, I adhered the black and white card stock  on the card base. Then I took another white card stock and stamped the butterflies from "Direction of  Happy" stamp set from Unity Stamps using Memento Black Ink.

Homemade greeting card design

Next I sponged the stamped images using Summer Sky Ink. To finish the card, I stamped the sentiment from Unity Stamps and added liquid pearls and adhered it on black panel.


chase your dream

Thanks for stopping by. Have a nice day.

If you like this post, please follow or subscribe to my blog by email / RSS or like us on Facebook


Linking to :Unity StampCAS(E) this sketchWord Art WednesdayCreative LadybirdsDL.ARTCraft Your PassionTTCRD

Friday, March 27, 2015

Homemade Birthday Card using Cupcake Stamp


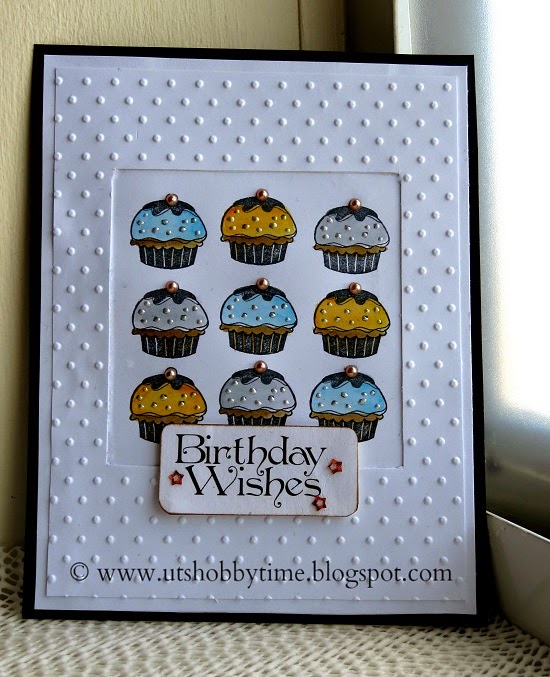
Hello All! For my card today, I started by stamping the Inkadinkado cupcake image multiple times on white cardstock using Tsukineko Memento Black Ink. I colored the images using Distress Ink and mounted it on  black cardstock.

coloring images with distress ink

I created the frame using white card stock and embossed it using Swiss Dot embossing folder. I glued them on  the stamped panel and added the Birthday digital sentiment using adhesive foam. Finally, decorated the cupcakes using liquid pearls and 3mm pearls and the sentiment with star confetti.

homemade greeting cards for birthday

Thanks for stopping by. Have a wonderful day.

Wednesday, February 11, 2015

Handmade CAS Love Greeting Card


CAS Card

Hi all, I have a CAS card to share today. First, I masked off the right panel and sponged the left side using  Spun Sugar distress ink. I then stamped the design multiple times on the sponged area to create the striped pattern along the sides.

distress ink project

Next, I stamped the rose flower, butterfly and  sentiment on the other side. I colored the flower using Spun Sugar and Shabby Shutters distress ink. Added some rhinestone and metallic cord to embellish the card. The "Love" sentiment is from Stampin Up and all the other stamps are from Parisian Postcard Stamp Set by Sweet and Sassy Stamps.

CAS card ideas

My Special thanks to Gracie ( Graciellie Design) for the beautiful Parisian Postcard Stamp Set.

Hope you like my card today. Thanks for stopping by.

If you like this post, please follow or subscribe to my blog by email / RSS or like us on Facebook. Feel free to leave your comments. I would love to hear from you.

Linking to:
Cosmic Straberry


Thursday, January 8, 2015

Christmas Card and Handmade Poinsettia Paper Flower Tutorial


handmade christmas card

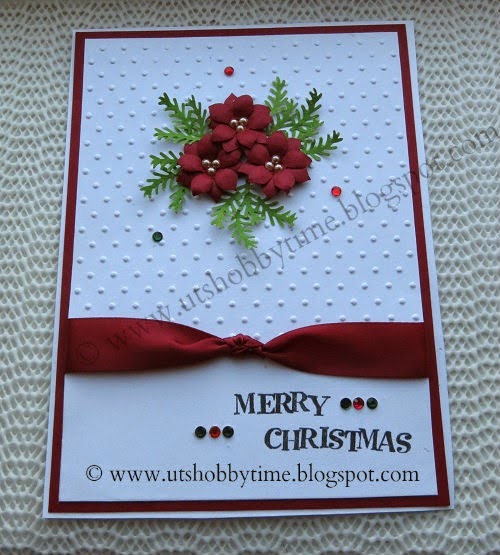
Hi All! Here is a Christmas card I created some days back. I started out with a white card base and layered it with red card stock. Next, I partially embossed the white card stock  using Swiss Dot embossing folder and adhered the ribbon around the panel and layered on to the red card stock.

handmade paper flower tutorial

I topped it with handmade poinsettia flowers and leaves. Leaves were punched out using Punch-Bunch punch. Then I stamped the sentiment using StudioG Stamps and finally added the rhinestones to embellish the card.

easy christmas card ideas

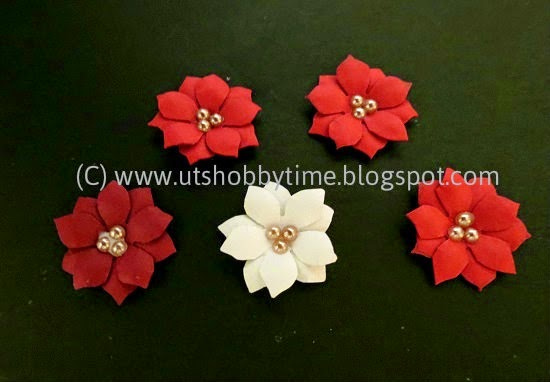
How to make handmade poinsettia paper flower: 

how to make handmade flowers

Products Needed:
Medium Retro Flower Punch, Embossing tool, Cardstock, Flat Pearls (3mm), Glue, Scissors


handmade paper flower tutorial

Punch out two flowers using retro flower punch (or cut freehand). Draw and/or cut the flowers as shown below.

how to make handmade paper flower step by step tutorial

Lay the flowers on the embossing mat and emboss the petals using the embossing tool in a circular motion.

how to make handmade flowers from paper step by step.

Invert the flower and emboss the center of the flower as shown.

flower making tutorial with photos

 Apply a dot of glue on the center and layer the flowers.

how to make handmade paper flowers step by step tutorial

Glue the pearls to the center of the flower.

how to make poinsettia paper flower


Hope you liked it.
 
Thanks for dropping by. Have a nice day.

Product Shopping List: Shop safe on Amazon


 Check out my paper flower tutorial HERE

http://utshobbytime.blogspot.com/2014/07/handmade-paper-rose-lower-congratulations-skinny-pink-card-tutorial-flourish.html
 
Check out my below Holiday Cards HERE and HERE

holiday card designs handmadehomemade christmas cards

If you like this post, please follow or subscribe to my blog by email / RSS or like us on Facebook. Feel free to leave your comments. I would love to hear from you.

Linking to :


Friday, January 2, 2015

Handmade Holiday Greeting Card using Distress Ink


cardmaking ideas
Hello Friends!! Wishing you all a Happy and Prosperous New Year.

I have a Holiday Card to share with you all today. First, I created the background with Broken China and Black Soot distress inks. I masked the center portion and stamped the snowflake.  I then removed the masking tape and stamped the sentiment.

distress ink bakground

The Snowflake image is from Unity Stamp and the sentiment is from Studio G stamps. Finally added the dots using liquid Pearls and mounted it on a black card stock. I hope you like my card today.

distress ink ideas

Thanks for stopping by. Have a great day.

If you like this post, please follow or subscribe to my blog by email / RSS or like us on Facebook. Feel free to leave your comments. I would love to hear from you. 

Check out my below Holiday Cards HERE and HERE
 
dry embossing cardhttp://utshobbytime.blogspot.com/2014/01/cas-simple-handmade-black-and-white-embossed-winter-card.html
Related Posts Plugin for WordPress, Blogger...